Chapter 3: Collecting data and troubleshooting online studies
Disclaimer: This chapter was made for the PsychoPy 2020.1 release. Screenshots and function names may differ if you are using a different version.
We will use this chapter to make the transition from more abstract discussions to some actual real-life problems of online experimenting, by setting up an actual study and collecting real data. In this chapter, we will modify our Stroop task with the help of Python and JavaScript code. Subsequently, we will adjust the study to be compatible with recruitment via Prolific and actually collect one data set.
The prerequisites for successfully completing this chapter are: (1) have completed Chapters 1 & 2; (2) have an online Stroop task, which is set as RUNNING on Pavlovia Ch.2: 1.2.; (3) have spent some time reading through the documentation of Prolific. The aim of these chapters is not to be fully comprehensive, but to provide structure, guidance and systematize valuable external resources. We strongly recommend to follow the links we provide in all chapters. It might not always be necessary to meticulously go through the linked materials, but it will be extremely helpful to skim the contents of the link before proceeding with the chapter.
1. Using Python | JavaScript to modify experiment
In PsychoPy you can create a study by using the Builder (as you did when creating the Stroop task), or by using the Coder. The Coder gives you more control and allows for a lot of customization, because your are essentially scripting everything from scratch. You can't switch back and forth between these two options for a single study. You can, however, compile your Builder experiment into not so easily readable Python code (usually good for quick glances under the hood). But you can't go the other way around - from Python code to Builder GUI. Critically, the developers of PsychoPy strongly recommend using the Builder and they always use it when building their own studies - even though they probably are the people least in need of a GUI. The reasons for this recommendation are manifold, from settings and timing-specific considerations, to the very convincing point of transferability. If you don't want to code your entire experiment in JavaScript from scratch, you can only use the Builder if you want to run a study online. As you witnessed in Chapter 2, experiments created via the Builder can be easily run both off- and online.
1.1. Code Components
As anyone who has ever worked with a GUI for experimental generation knows, such builders are usually insufficient for more complex designs. In order for them to remain simple, they are lacking the flexibility which is required to handle specific customization needs. Fortunately, PsychoPy provides an elegant way of meeting more complex design challenges - Code Components. These components can be inserted at the desired locations within the experimental framework in order to solve more complex problems using code.
1.2. Alter your study with Python code
Let's try out a Code Component. Maybe we want to give response contingent feedback after every word. That is, tell participants if they were correct or not.
-
First, we need to add a new
Routine, place it within thetrialsloop, after thetrialroutine and name itfeedback.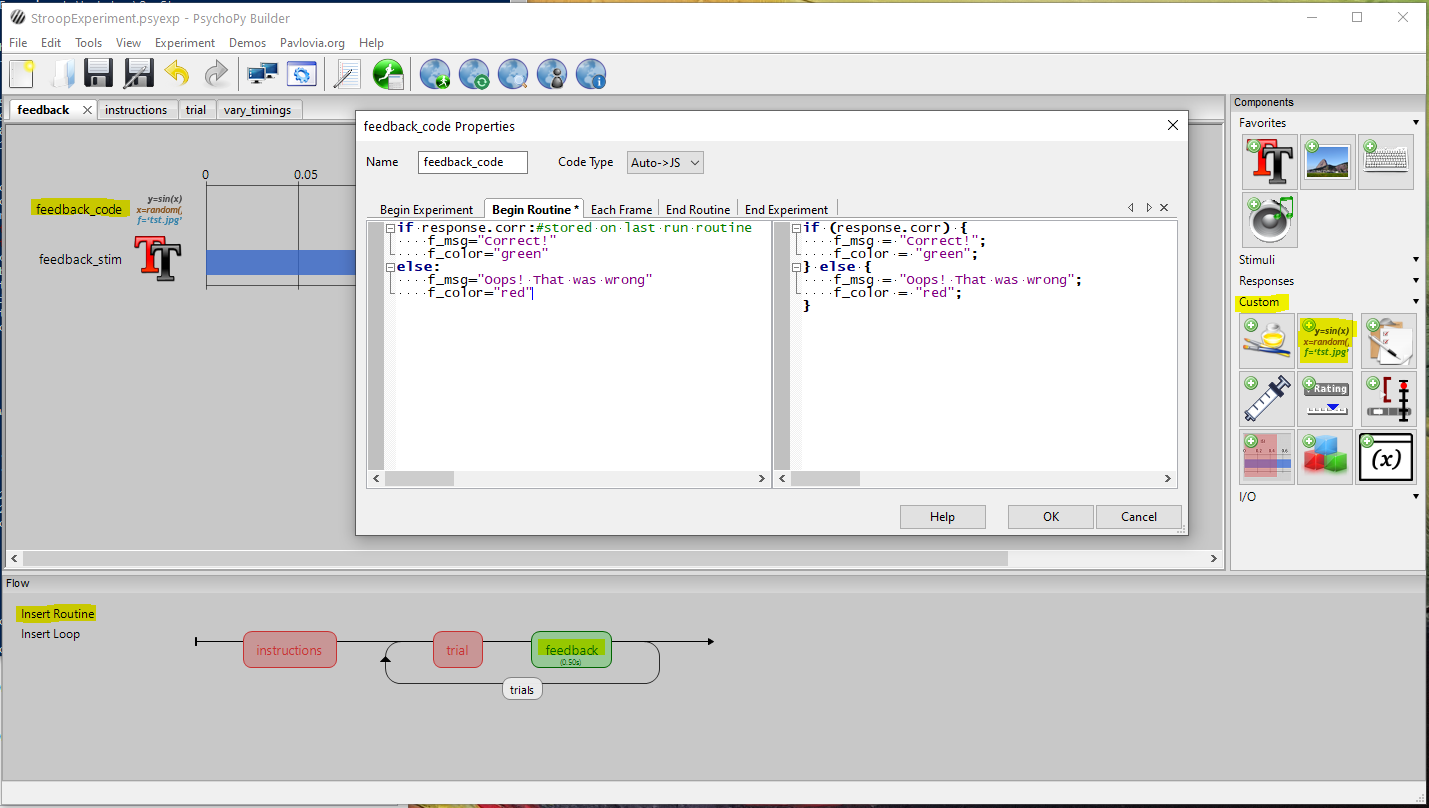
-
In this new routine, we add a Code Component from the
Componentstab on the right, underCustom. -
Now, we can code the conditional statement controlling when the feedback message will say "Correct" and be depicted in green (vs. "Wrong" in red). Critically, the code needs to be placed inside the
BeginRoutinetab, in order to be updated every trial.Here we are making use of a variable automatically generated by PsychoPy, that is
response.corr. The value of this variable will be either "#None", "0" or "1", if you are using 'store correct' in yourresponsecomponent within thetrialroutine. Most components in PsychoPy offer such output variables and it is good to familiarize yourself with the components that you are using.Note that PsychoPy is already out-converting your Python code into JavaScript if you have set
Code Typeto beAuto->JS. More about this in section1.3.. -
Finally, we have created the variables
f_msgandf_color, but we need to create a text component which actually presents the feedback. Luckily, we have already done something similar when presenting the colored words for the Stroop task.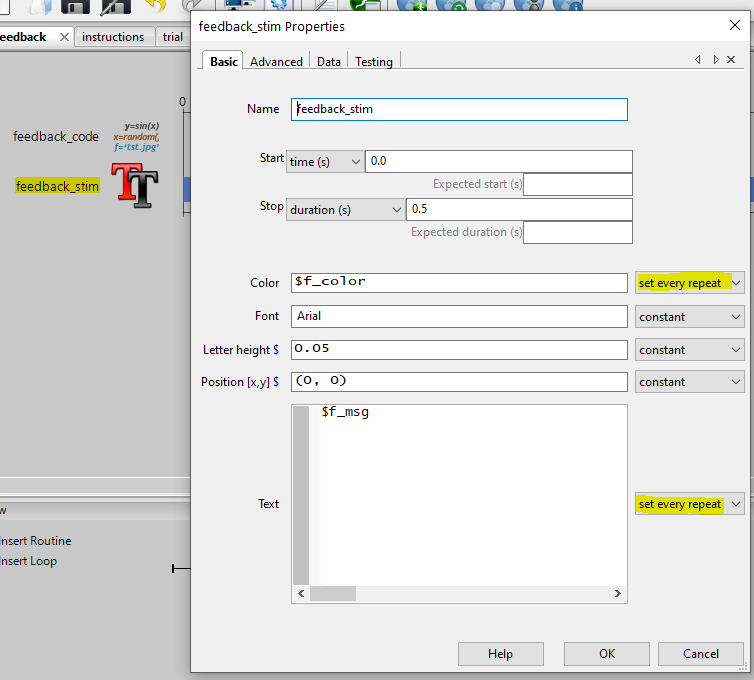
Now, test if your feedback works locally and afterwards sync it to Pavlovia  .
.
If the feedback is also working when you run your study online (like this), then the only thing left to do is to (1) increase the amount of trials to 10 per condition
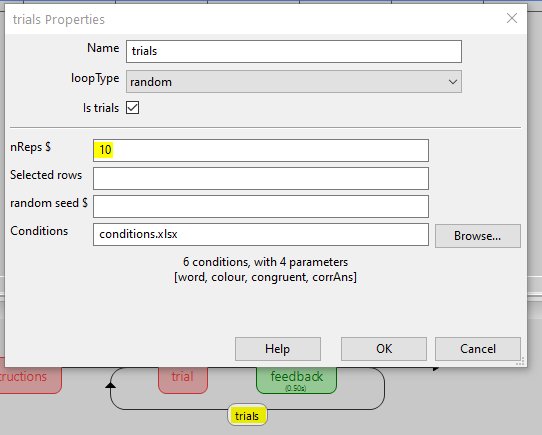
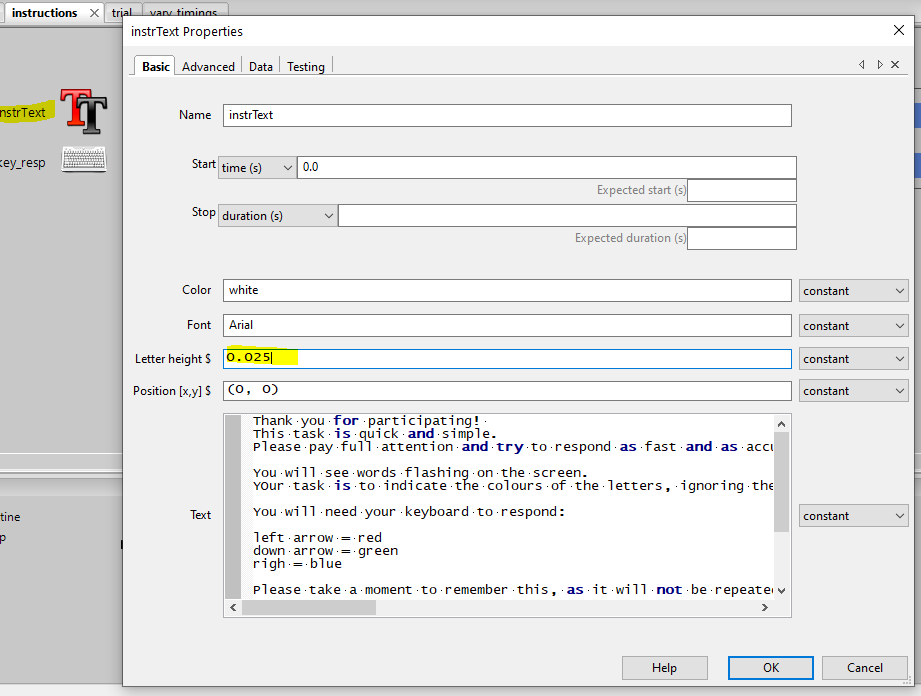
and to (2) make the instructions a bit more informative.
Thank you for participating!
This task is quick and simple.
Please pay full attention and try to respond
as fast and as accurate as possible.

You will see words flashing on the screen.
Your task is to indicate the colours of the letters,
ignoring the word.

You will need your keyboard to respond:

left arrow = red
down arrow = green
right arrow = blue

Please take a moment to remember this, as it will not be repeated.

Again, respond according to the colors of the LETTERS,
and IGNORE the meaning of the word.

Thank you for your time.


(This study is not part of a research project and
  is only used for educational purposes.)
Finally, (1) delete all the data files in the /data folder of your project, (2) sync this final and clean version of your project, (3) complete the online task yourself to see how long it takes and (4) send the participation link to one of your friends/colleagues in order to collect one pilot data set.
1.3. Translate from Python to JavaScript for online compatibility
Running experiments online requires the translation of everything you do into JavaScript. The Builder does this automatically - all supported drag-and-drop components will translate into JS. For Code Components, this is a bit more difficult. A new feature of PsychoPy is that it automatically translates Python into JS if Code Type is set to Auto->JS. This is quite elegant, but note that it ONLY works for base-Python syntax. Whenever you are using functions from specific libraries, you will need to find an equivalent solution in JS.
1.3.1. Functions from PsychoPy
For functions which are PsychoPy-specific, you will find corresponding PsychoJS functions - that is the JavaScript implementation of some of the more popular PsychoPy functions.
1.3.1. Functions from other libraries
If you want to use functions from other packages, things can become a bit more hacky. You will need to look for solutions on the forum or simply search online - after all JavaScript is one of the most used languages in the world.
For example, very frequently used functions for experiments are the ones coming from the random library. If you would want to draw a random number between 8 and 14, you could do:
# this is how we comment in Python
import random
stim_loc = random.randint(8,14)
The function random.randint() comes from the library random, thus the automatic Python->JS conversion will not know what to do and simply repeat the function. In order to change this, we would need to set Code Type to Both and find a solution online or on the forum:
//this is how we comment in JS

//create our own function
//we use the Math library which is available
function getRndInteger(min, max) {
  min = Math.ceil(min);
  max = Math.floor(max);
  return Math.floor(Math.random()*(max-min+1))+min;
}
stim_loc = getRndInteger(8,14)
If you want to just play around with different JavaScript code snipplets and see what they do, we can recommend just using an online JS editor in the beginning.
1.4. Troubleshooting the study online
When testing if your study is running smoothly online, it is not very intuitive to know how exactly to debug and troubleshoot errors. You might find yourself stuck at a specific part of the experiment without getting helpful error messages from within the browser.
A way to get a bit more control over the troubleshooting process is to open the inspector console of your browser. The way to get there, might vary between browsers.

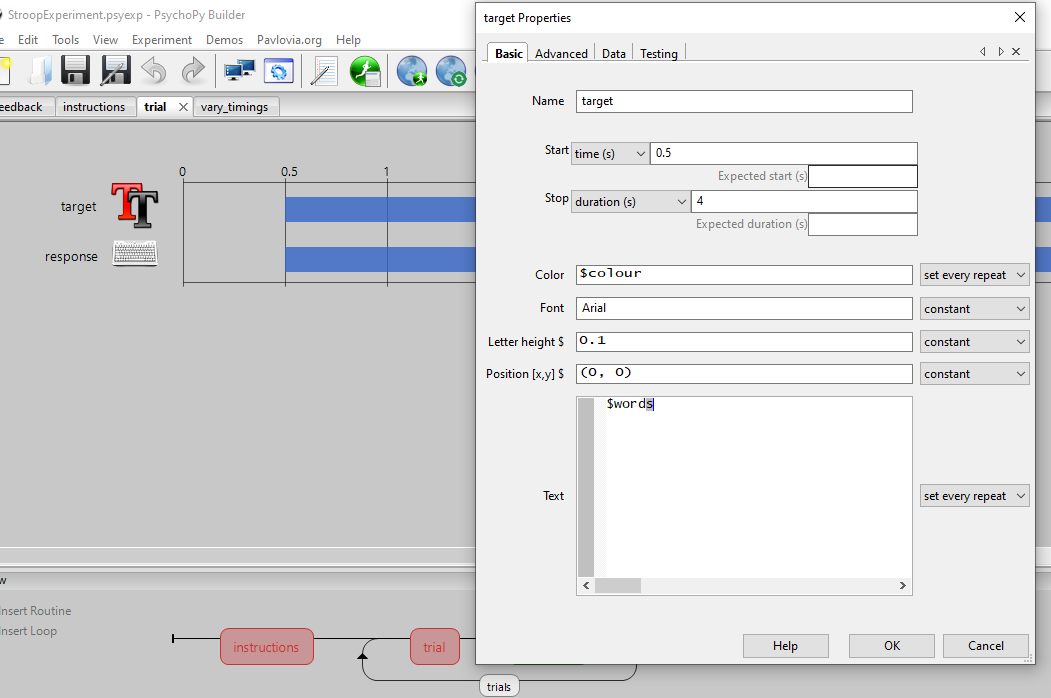
The console of your browser will reveal the contents of what you are trying to run and also hopefully shed some light on the source of the error. Let's introduce an error in our experiment and track it down using the browser console.
First, we will introduce the error. Simply, change $word to $words in the target component of the trial routine.
Now Sync the project and give the commit a meaningful name, e.g. "add error to code".
Note that changes sometimes take a while to be updated. Another important note is that you might want to clear your browser's cache from time to time. In order to be fast and efficient, browsers often "remember" the last time you have visited a link and use this remembered information in order to preload the page.
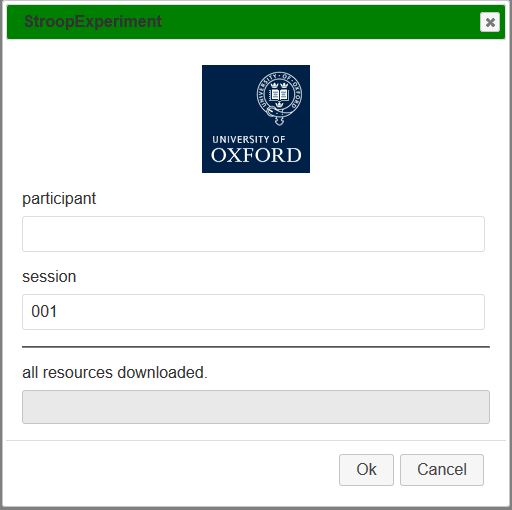
When you get to the landing page of your study (where you insert the participant's information), open the inspector and switch to the Console tab.
You will get to the Instructions page, as the bug we introduced comes after that. But once you hit the space button your experiment will crash.
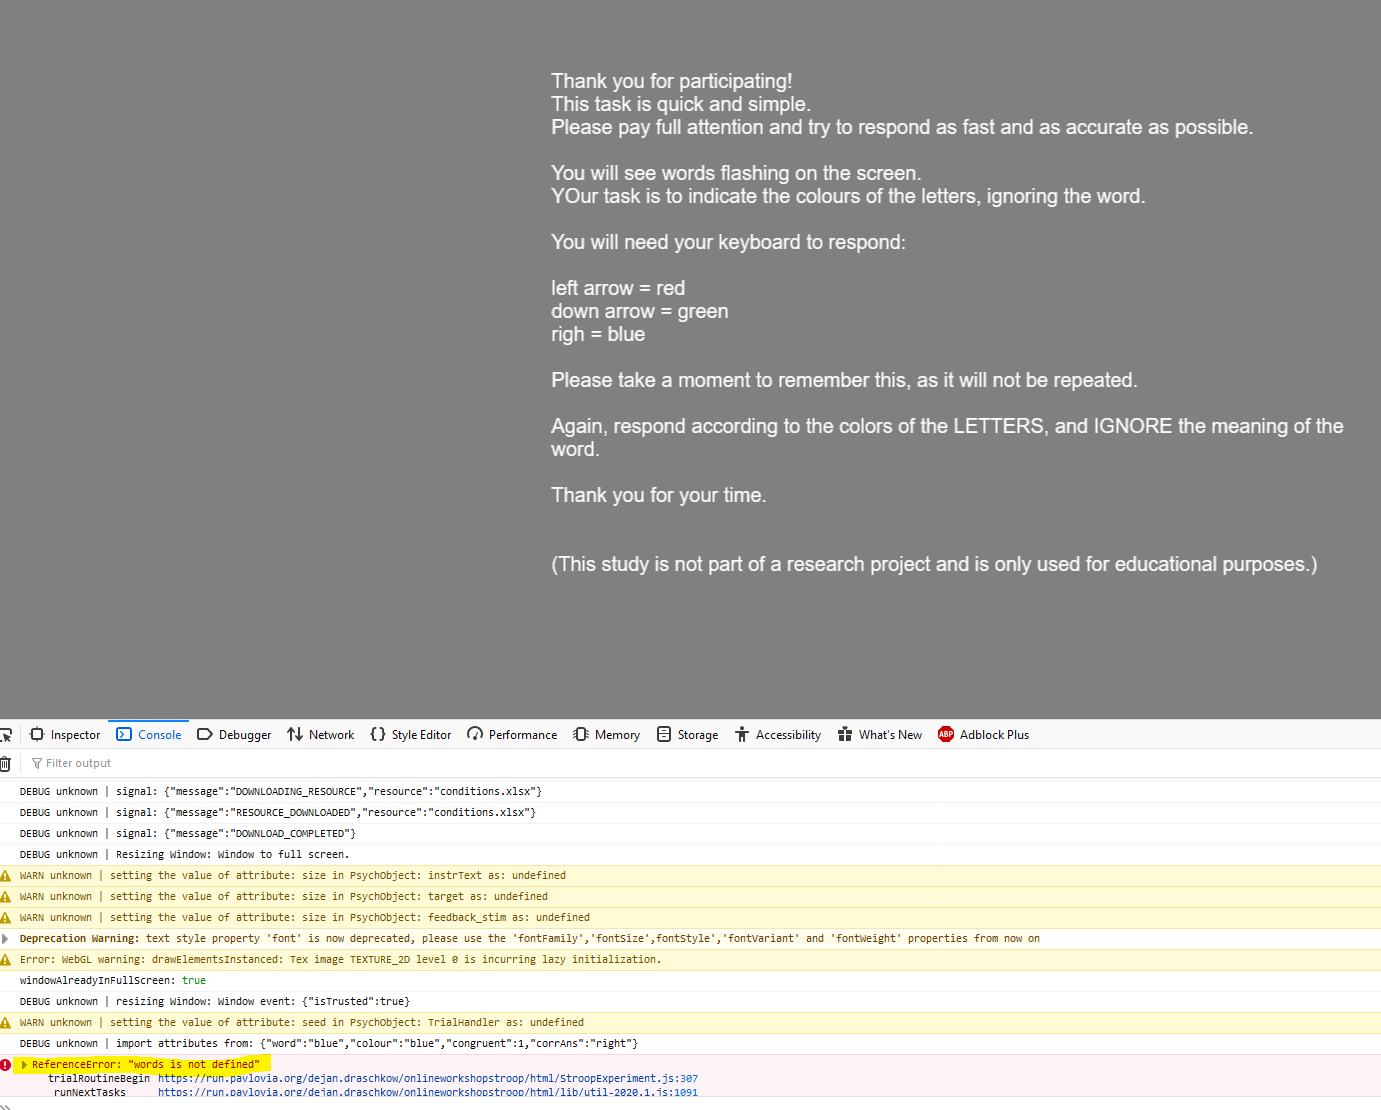
In the Console, you will see the reason for this crash: words is not defined.
Please fix the typo and Sync the project, before you continue with the chapter.
1.5. Have a look at the data
Once we are happy with our design and have collected our first pilot data, it is a good idea to evaluate the data and also check if we are storing all necessary variables.
First, we will need to collect the pilot data from the server. You can do this by simply syncing your project, which will download all available data files to your local machine. Another way to get to the data is to download it directly from the GitLab page of a/your project.
To analyze the data, you can use your favorite scripting language. Here, we will use R to interrogate the data files and provide an example.
Follow this link to have a look at the analysis, and/or download the .Rmd file to play with it yourself. Here, we are piggybacking on the feature that my project is already online, so we also added my scripts to it. As open as it gets - the exact files required to reproduce the experiment and the analysis are all together in one repository which tracks all changes we make to it. Also super useful if repository is kept private.
The take home message from the script (in case you didn't go down this analysis rabbit hole) is that it seems like all the important variables are being logged and the data looks OK.
It is also worth thinking about how you can be confident that participants have stayed engaged during your study. You may want to determine some parameters from task performance that will be useful, based on your pilot data. You may also want to include attention check questions or task understanding questions.
2. Advertise your study
If we are happy with how the piloting worked out and have probably done a couple of additional pilot tests, we might feel ready to advertise our study to actual participants.
2.1. Share study-link manually
As discussed previously, you can always simply share your study link. It is the one you will see in your browser after clicking the Run button in your Pavlovia dashboard.
If we share the link to our study as we find it in the browser (https://run.pavlovia.org/dejan.draschkow/onlineworkshopstroop/html/), there are degrees of freedom that we may or may not feel comfortable with.
The participant we wish to send it to, will fill out the participant field the way they feel comfortable with, and might also edit the pre-filled sessions field.
But maybe we want to send them a link in which these fields are already pre-set by us. We can do so using Query strings. Variables can be passed to the experiment using the URL (this is what recruitment services such as Prolific do automatically):
https://run.pavlovia.org/dejan.draschkow/onlineworkshopstroop/html/?participant=14
In this example, the participant variable will be pre-set to 14, and the data file generated by the experiment will have 14 populating the column participant.
Have a look here for more information on query strings.
2.2. Advertise on marketplace (e.g. Prolific)
We will use Prolific, to describe an example of how to advertise your study using a recruitment service.
Please refer back to Chapter 1, Section 1.4.3. if the following steps seem incomprehensible. There is also more information on this step available here.
- Make sure you have an account (
Chapter 1, Section 1.4.3.). -
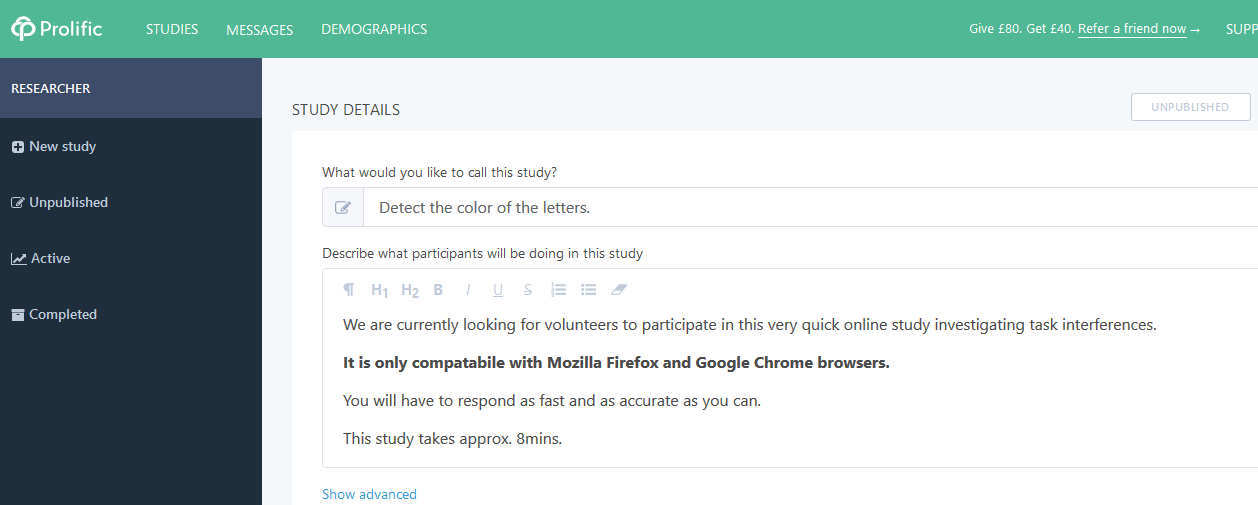
Create/add a new study on Prolific. Give the study a meaningful name and description.
-
The next step is to add the Pavlovia URL to Prolific (including parameters to receive the Study ID, etc.). Make sure to use your own link here (not the one shown in the picture)!
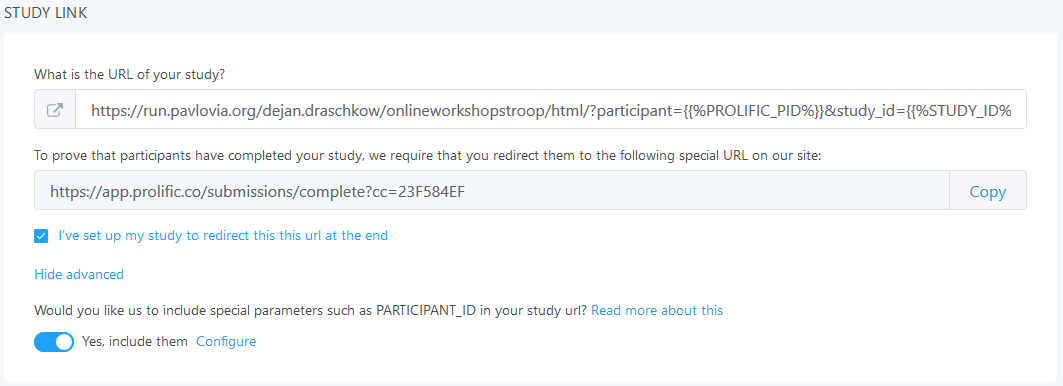
-
Now, set the completion URL provided by Prolific in PsychoPy.
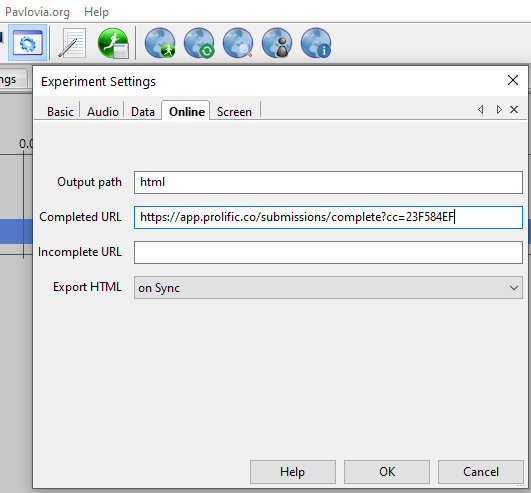
-
Don't forget to sync these changes to your experiment
. -
Think about who you want to invite to your study.
Prolific allows you to tailor who will see your study, in a number of useful ways. Firstly, you can select for Prolific to recruit you a representative sample. Secondly, you can apply custom pre-screening. This may include screening for participants who meet certain demographic criteria (e.g. women over 50 in the UK), who are in a group of particular interest to you (e.g. people who have disclosed a specific medical condition), who meet certain criteria regarding participation on Prolific (e.g. those who have submitted above or below a certain number of previous studies on Prolific), or using a custom-screener. This final option allows you to specifically invite particular Prolific users by their id (typically when you want to do a follow-up visit in a longitudinal study), or prevent certain Prolific users from being invited (typically when you want to exclude people who have taken part in a similar study, to prevent practice effects etc). You can combine any of these pre-screening options. You may also want to determine which devices can be used to complete your study, choosing out of "mobile", "tablet" and "desktop" - this is particularly important if your tasks are designed for a specific format (e.g. they require a laptop or desktop keyboard).

-
We will just recruit one participant for this very quick study - spend 1 pound on it.
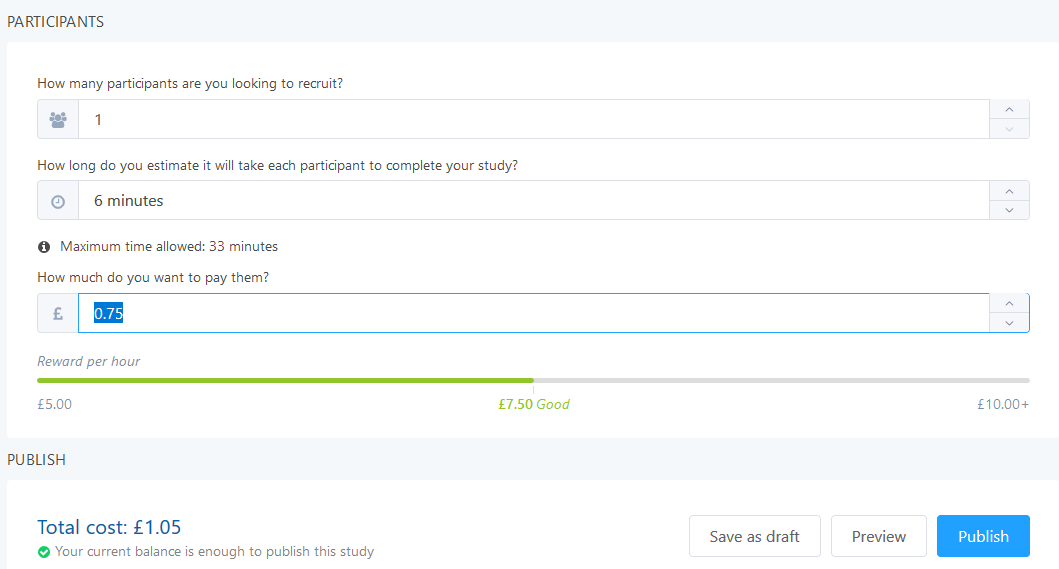
-
Finally,
Save as draftso you can publish it whenever you want.
2.2. Run the study
-
Go to your
Unpublishedstudies, select the one you want to publish and hit thePublishbutton.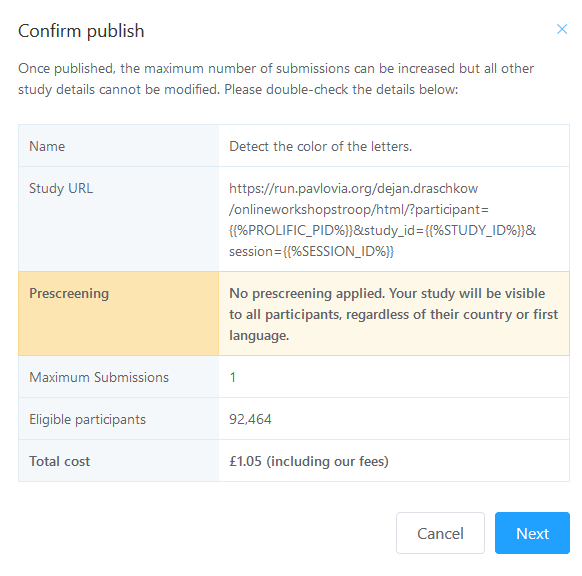
-
Now, you can
Startrecruitment. You can increase your places gradually, which may be particularly advisable with a large sample (100+ participants).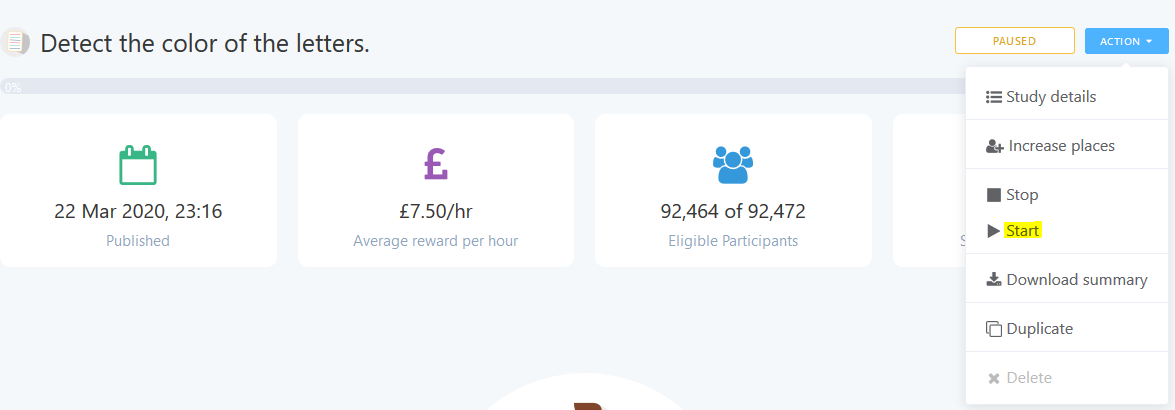
-
Prolific will keep you up to date about current and past participation.

-
Once a participant is done, you will have to Review the status: either
ApproveorReject. This decision should likely be based on the participant's performance. If the participant's performance indicates that they have not actually done the task, then it might be justified toReject; Prolific provides guidance on how to make these decisions. Make sure to set objective criteria which would lead to a rejection and make these transparent to the participants in the study description and in the Participant Information sheet. If they have had technical problems or decided to withdraw, they will usually opt to "Return" their submission - Prolific encourages you to allow participants to return submissions where participants have withdrawn consent or had technical problems. Partial payments are also an option. If you have a large study, you may want to approve large numbers of participants at a time - if you select the menu under "More" you have the option to "Approve by upload" which allows you to include a list of participants IDs to approve payment for (this could be copied from a column in data file).
-
You may want to communicate with all/a subgroup of your participants by sending a mass message - this can be useful for sending a thank you message to everyone after the study has finished, explaining about follow up visits, contacting people who've had technical issues and may want another chance to complete the study etc. To do so, you can select the menu under "More", click "Bulk message" and then you can include a list of IDs and a message for everyone. For longitudinal studies, thanking and updating participants is particularly important for engaging and retaining your sample; many are really interested in how their data gets used. You may be pleasantly surprised at the replies you get!
-
Once you have collected the number of participants you set out to collect, your study is completed. You can now find it under 'Completed' studies rather than 'Active' studies on the left side of your Prolific dashboard. Under the
Actionbutton next to your completed study you can download a summary of your study by clickingDownload summary. In this summary, you'll find a list of all your participants with their Prolific IDs and how much each of them was paid.
2.3. Collect data and evaluate results
We can now collect the new data from the server. You can do this by simply syncing your project, which will download all available data files to your local machine (see 1.5.).
With this step you have just completed a full cycle in online experimentation. In the following chapters, we will explore more complex experimental designs and solve other real-life problems, but conceptually we have already covered all important mile stones for a successful transition to online testing.